Many of the standard environments for evaluating continuous control reinforcement learning algorithms are built using the MuJoCo physics engine, a paid and licensed software. Bullet Physics provides a free and open source alternative to physics simulation.
PyBullet is a simple Python interface to the physics engine Bullet. It is easy to install (via pip install pybullet) and use and it is yet a powerful tool. This article will give a brief glimpse at what you can do with it. A more detailed guide can be found in the pybullet quickstart guide. A great overview of the new features of Bullet 2.89 can be found here. It might become the de facto standard simulation environment for reinforcement learning in the next years.
In this part, I will give a very basic introduction to PyBullet and in the next post I’ll explain how to create an OpenAI Gym Environment using PyBullet. Here, I want to create a simulation environment for robotic grasping. The environment consists of a manipulator (in this case Franka Emika Panda.) I will do this step by step with including only absolutely essential elements.
PyBullet can load kinematic descriptions of robots or other objects from URDF files. There are many tools that support URDF, for example, inverse kinematics solvers, visualization tools, etc. Other supported formats are Bullet’s own format, Gazebo’s SDF, and MuJoCo’s MJCF files. These support multiple objects and allow you to load entire simulation scenarios at once. PyBullet also comes with some objects that are often useful, for finding the available components in PyBullet, you should look into pybullet_data. First let’s add a robot to the environment. We would need os for creating path for finding the objects that we want to add to the environment. pybullet.connect(pybullet.GUI) starts the simulation graphical user interface. pybullet.stepSimulation() runs one step of the simulation.
import os
import pybullet as p
import pybullet_data

p.connect(p.GUI)
pandaUid = p.loadURDF(os.path.join(pybullet_data.getDataPath(), "franka_panda/panda.urdf"),useFixedBase=True)

while True:
    p.stepSimulation()
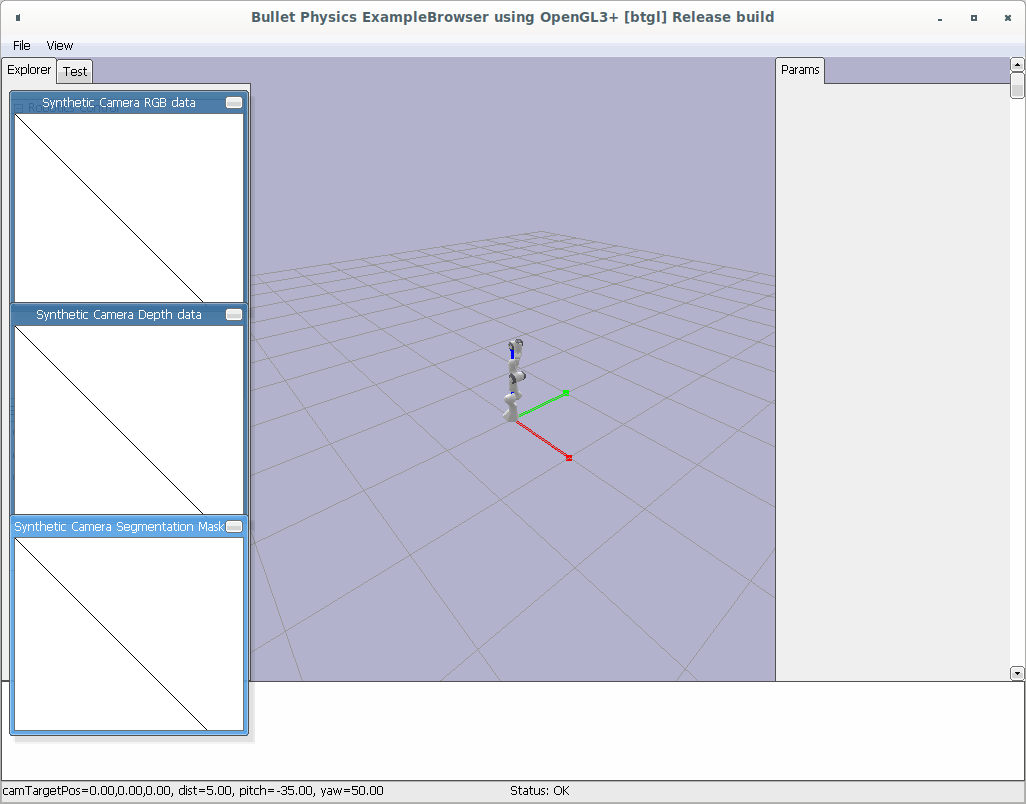
let’s name this file test.py and run it by python test.py which results the following:
Now let’s put this robot on a table. Add the following to your code right after loading the robot.
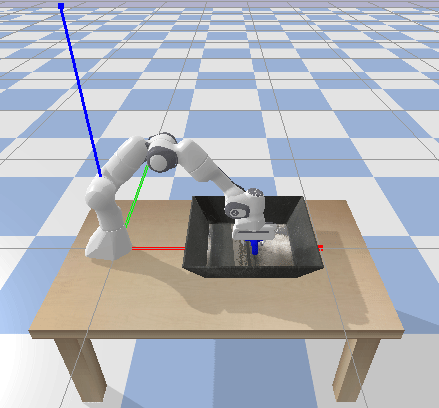
tableUid = p.loadURDF(os.path.join(urdfRootPath, "table/table.urdf"),basePosition=[0.5,0,-0.65])
Now let’s add a bin since we want to solve bin picking problem here.
trayUid = p.loadURDF(os.path.join(urdfRootPath, "tray/traybox.urdf"),basePosition=[0.65,0,0])
As I said all the available objects can be found under pybullet_data, there are also lots of random objects that can be used for grasping. Let’s add one of them to the tray.
p.setGravity(0,0,-10)
objectUid = p.loadURDF(os.path.join(urdfRootPath, "random_urdfs/000/000.urdf"), basePosition=[0.7,0,0.1])
I have added the object from a height. I also added gravity so that the object will fall into the tray.
I know I mentioned that I only write a code that we absolutely are going to need but the following is a bit necessary as it changes the initial view of the environment. Instead of starting from far away from the environment, the simulation starts from a close angle.
p.resetDebugVisualizerCamera(cameraDistance=1.5, cameraYaw=0, cameraPitch=-40, cameraTargetPosition=[0.55,-0.35,0.2])
Now, we are ready to move the robot toward the object to grasp it. pybullet.setJointMotorControl2([objectUid],[jointIndex],[controller],[targetPosition]) will control the robot joints and move them. The joint index is based on what it is defined in the decription file (e.g. URDF.) For instance, the way Franka Emika Panda is defined in PyBullet, it makes the fingers joint 9 and joint 10 and they are controlled separately. That is why if you take a look at python -m pybullet_robots.panda.loadpanda_grasp you will see a part for balancing these fingers to be cenetered.
The following positions the robot at the top of the object:
p.setJointMotorControl2(pandaUid, 0, p.POSITION_CONTROL,0)
p.setJointMotorControl2(pandaUid, 1, p.POSITION_CONTROL,math.pi/4.)
p.setJointMotorControl2(pandaUid, 2, p.POSITION_CONTROL,0)
p.setJointMotorControl2(pandaUid, 3, p.POSITION_CONTROL,-math.pi/2.)
p.setJointMotorControl2(pandaUid, 4, p.POSITION_CONTROL,0)
p.setJointMotorControl2(pandaUid, 5, p.POSITION_CONTROL,3*math.pi/4)
p.setJointMotorControl2(pandaUid, 6, p.POSITION_CONTROL,-math.pi/4.)
p.setJointMotorControl2(pandaUid, 9, p.POSITION_CONTROL, 0.04)
p.setJointMotorControl2(pandaUid, 10, p.POSITION_CONTROL, 0.04)
Putting this piece of code either in the while loop or before it positions the robot right on top of the objects and opens the gripper fingers (joint 9 and joint 10.) Here, we did not use any fancy inverse-kinematic capability of PyBullet and sent only joint command to the robot. This is something that I will cover in future.
Another point is that if you run the code the robot jumps to the target position and there is no smooth simulation rendering. For the sake of better demonstration we can render the simulation in each step by adding the following to the while loop:
p.configureDebugVisualizer(p.COV_ENABLE_SINGLE_STEP_RENDERING)
Now, we are ready to pick up the object! I implemented the grasping process using different states. First state (current_state == 0) is posing over the object and opening the fingers. Next (current_state == 1) is going down at the object level. Then (current_state == 2), closing the fingers. Finally (current_state == 3), picking up the object. Each of these states assumes to have 1 unit duration. We are going to repeat these steps over and over again. We define each step to take control_dt = 1./240. using pybullet.setTimestep.
The following is what the complete code looks like:
import os
import pybullet as p
import pybullet_data
import math

p.connect(p.GUI)
urdfRootPath=pybullet_data.getDataPath()
pandaUid = p.loadURDF(os.path.join(urdfRootPath, "franka_panda/panda.urdf"),useFixedBase=True)

tableUid = p.loadURDF(os.path.join(urdfRootPath, "table/table.urdf"),basePosition=[0.5,0,-0.65])

trayUid = p.loadURDF(os.path.join(urdfRootPath, "tray/traybox.urdf"),basePosition=[0.65,0,0])

p.setGravity(0,0,-10)
objectUid = p.loadURDF(os.path.join(urdfRootPath, "random_urdfs/000/000.urdf"), basePosition=[0.7,0,0.1])

p.resetDebugVisualizerCamera(cameraDistance=1.5, cameraYaw=0, cameraPitch=-40, cameraTargetPosition=[0.55,-0.35,0.2])

state_durations = [1,1,1,1]
control_dt = 1./240.
p.setTimestep = control_dt
state_t = 0.
current_state = 0

while True:
    state_t += control_dt
    p.configureDebugVisualizer(p.COV_ENABLE_SINGLE_STEP_RENDERING)
    if current_state == 0:
        p.setJointMotorControl2(pandaUid, 0,
                        p.POSITION_CONTROL,0)
        p.setJointMotorControl2(pandaUid, 1,
                        p.POSITION_CONTROL,math.pi/4.)
        p.setJointMotorControl2(pandaUid, 2,
                        p.POSITION_CONTROL,0)
        p.setJointMotorControl2(pandaUid, 3,
                        p.POSITION_CONTROL,-math.pi/2.)
        p.setJointMotorControl2(pandaUid, 4,
                        p.POSITION_CONTROL,0)
        p.setJointMotorControl2(pandaUid, 5,
                        p.POSITION_CONTROL,3*math.pi/4)
        p.setJointMotorControl2(pandaUid, 6,
                        p.POSITION_CONTROL,-math.pi/4.)
        p.setJointMotorControl2(pandaUid, 9,
                        p.POSITION_CONTROL, 0.08)
        p.setJointMotorControl2(pandaUid, 10,
                        p.POSITION_CONTROL, 0.08)
    if current_state == 1:
        p.setJointMotorControl2(pandaUid, 1,
                        p.POSITION_CONTROL,math.pi/4.+.15)
        p.setJointMotorControl2(pandaUid, 3,
                        p.POSITION_CONTROL,-math.pi/2.+.15)
    if current_state == 2:
        p.setJointMotorControl2(pandaUid, 9,
                        p.POSITION_CONTROL, 0.0, force = 200)
        p.setJointMotorControl2(pandaUid, 10,
                        p.POSITION_CONTROL, 0.0, force = 200)
    if current_state == 3:
        p.setJointMotorControl2(pandaUid, 1,
                        p.POSITION_CONTROL,math.pi/4.-1)
        p.setJointMotorControl2(pandaUid, 3,
                        p.POSITION_CONTROL,-math.pi/2.-1)

    if state_t >state_durations[current_state]:
        current_state += 1
        if current_state >= len(state_durations):
            current_state = 0
        state_t = 0
    p.stepSimulation()
Now that we have learned the very basics of PyBullet, we are ready to build a gym environment which I will explain in the next post.